When we rebuilt the front end a year ago the body was off the chassis. Now that the body is on the chassis, the headlight brackets are installed and the hood is aligned, we can see there are issues.

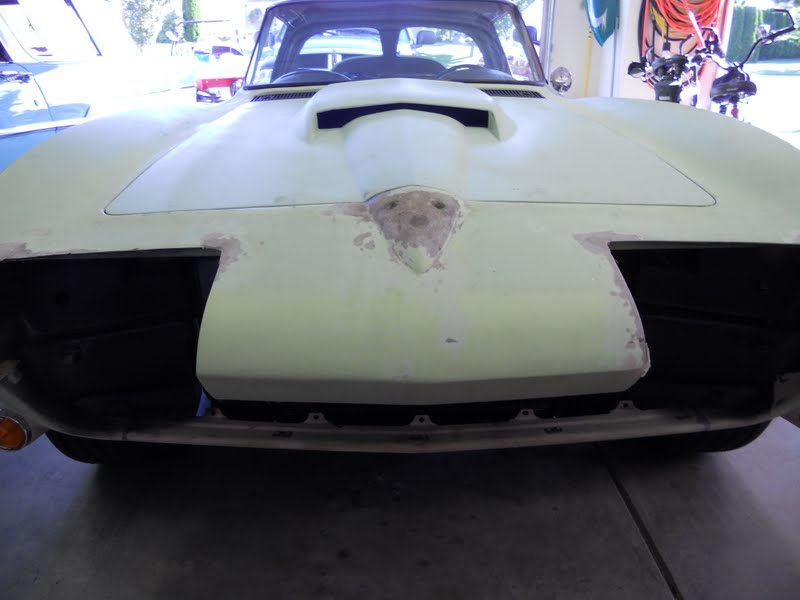
The front corners of the hood and the front center of the hood are properly shimmed with the body but the nose sags in between those areas. Ty and I agreed the mismatch in height was unacceptable and we also agreed the cure would not be Bondo.

It sags between each of the headlight buckets.

We decided to remove the front end support structure in its entirety and start over. This took hours of work and it was not for the squeamish.

If you double click on this picture you'll see hammers, chisels, a sledge hammer, an air chisel and a variety of other tools of persuasion. More importantly, the nose support and the headlight bucket supports have been removed.

After grinding away the old bonding adhesive from all the supports and the underbody we started reassembly. Because bonding adhesive sets up so quickly it was decided to bond the nose support in sections starting with the center. In this picture the clamps hold the the nose support in position while the center section is being bonded. The dumbbell is holding the center section flush with the hood.

Bonding adhesive is a catalyst compound that basically glues fiberglass pieces together. Unlike Bondo, it can not be used as a filler. Because the hood support is now bonded at the center, access to the rest of the support is limited. In cases like this I've found that disposable cake decorating bags work great as an applicator. In this picture the bonding adhesive is mixed, loaded in the bag and ready to be piped into place. All I have to do is snip the bag and squeeze. I get about 10 minutes working time before the adhesive starts to set up.

Once again I use dumbbells to maintain alignment with the hood. They work great.

I think the results are exceptional. Compare this picture with the first and judge for yourself.
If you haven't guessed, headlight buckets are next.
Thanks for watching.


