Translate

Monday, May 27, 2013

Interior Trim, Door Sills, Glove Box Door and a Distraction

I spent the last couple weeks with family in Wisconsin.  Max H reminded my wife that I have an obligation to my blog followers and I need to provide an update soon.  Here you go Max!

The interior trim was primered, sanded, then primered again on all sides. 


All sides were painted with Por15, the same paint I used on the speaker grill and dash cluster.  I'll let this dry for several days before I start assembly.


Door sills are usually fastened with sheet metal screws.  I decided to use Rivet-Nuts instead.


The door sills look great and really add to the finish of the interior.


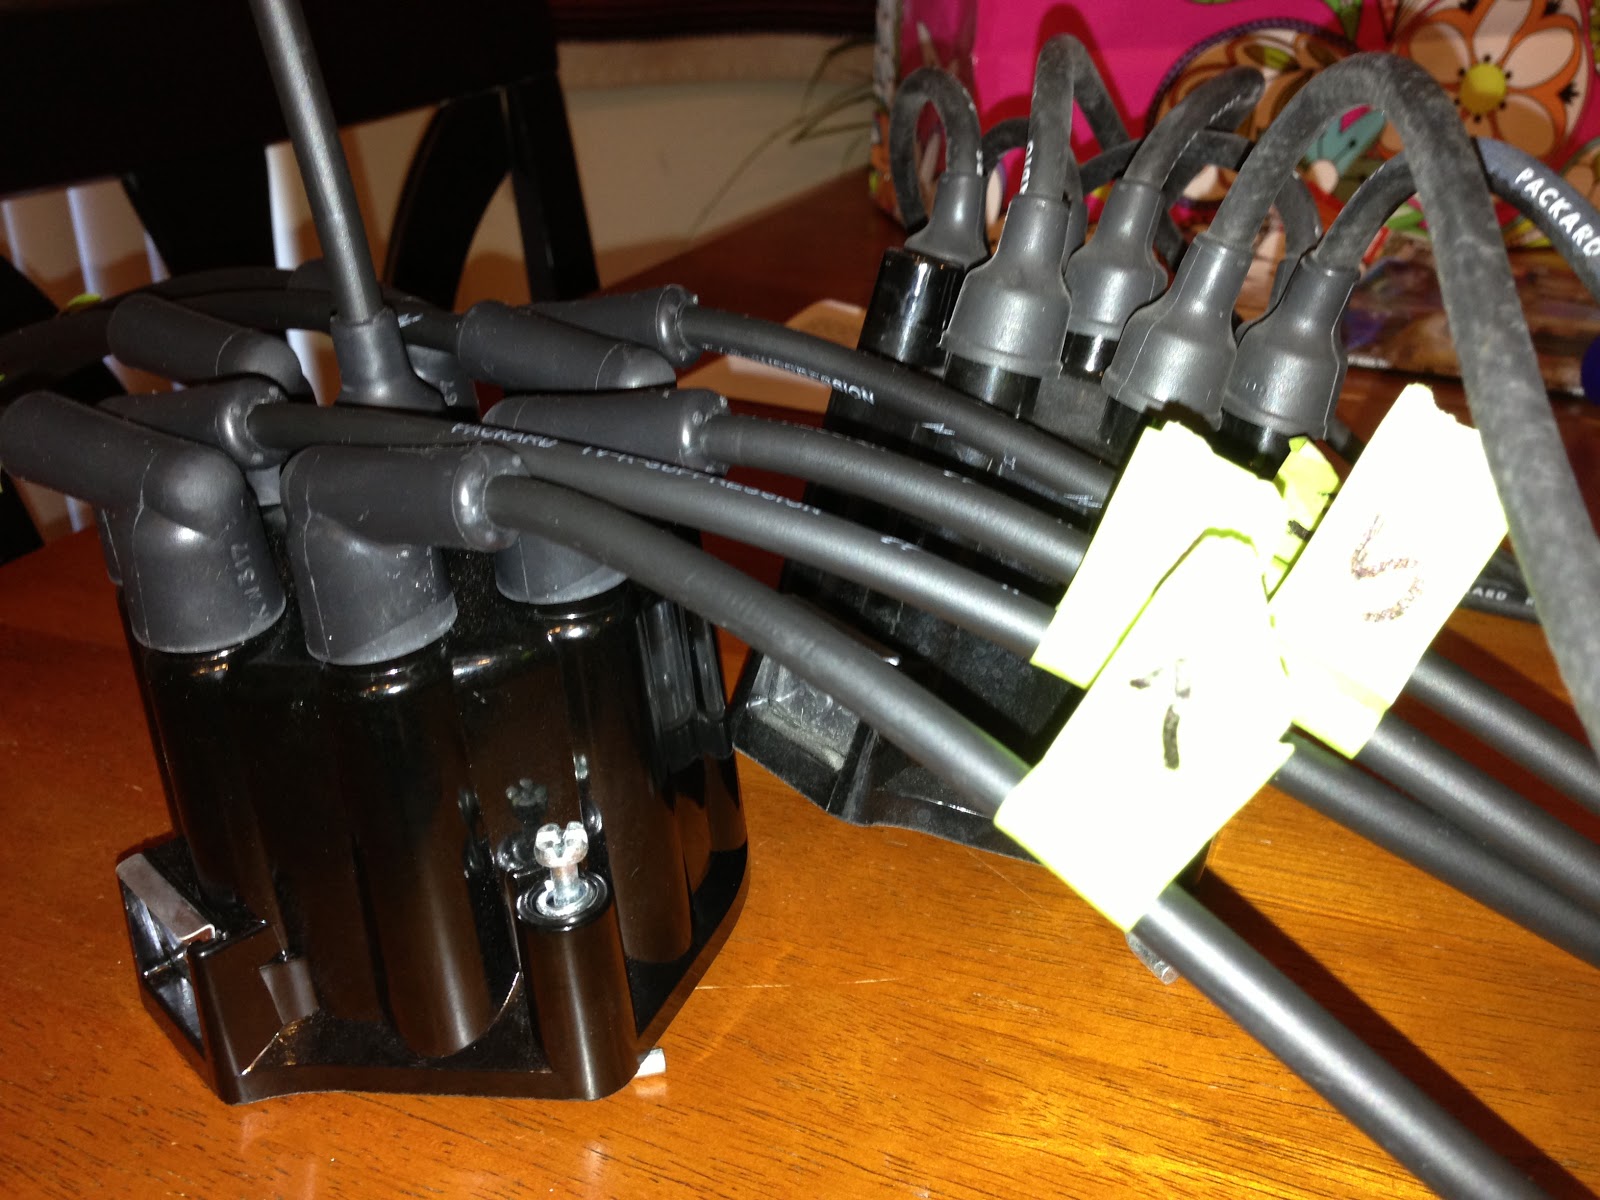
The coil wire now has 90 degree caps.  The distributor and coil are ready for radio shielding.


But first I need properly made mounting brackets.  The reproduction on the left has a mounting plate installed incorrectly.  The one on the right is correct.  Errors like this are not uncommon with reproduction pieces.


Same thing for this bracket.  The one on the top is correct.  The one on the bottom is incorrect.


The radio shielding is very difficult to install.  It's no wonder most of these were removed and never reinstalled.  The remaining shielding I have is incorrect for a 63.  That will be added to my to-do list.


I have 4 used glove box doors.  None are of the same quality as our build.  This is the best one I have but it's for a 64 Corvette and it has a few blemishes.  I am not tickled with it.


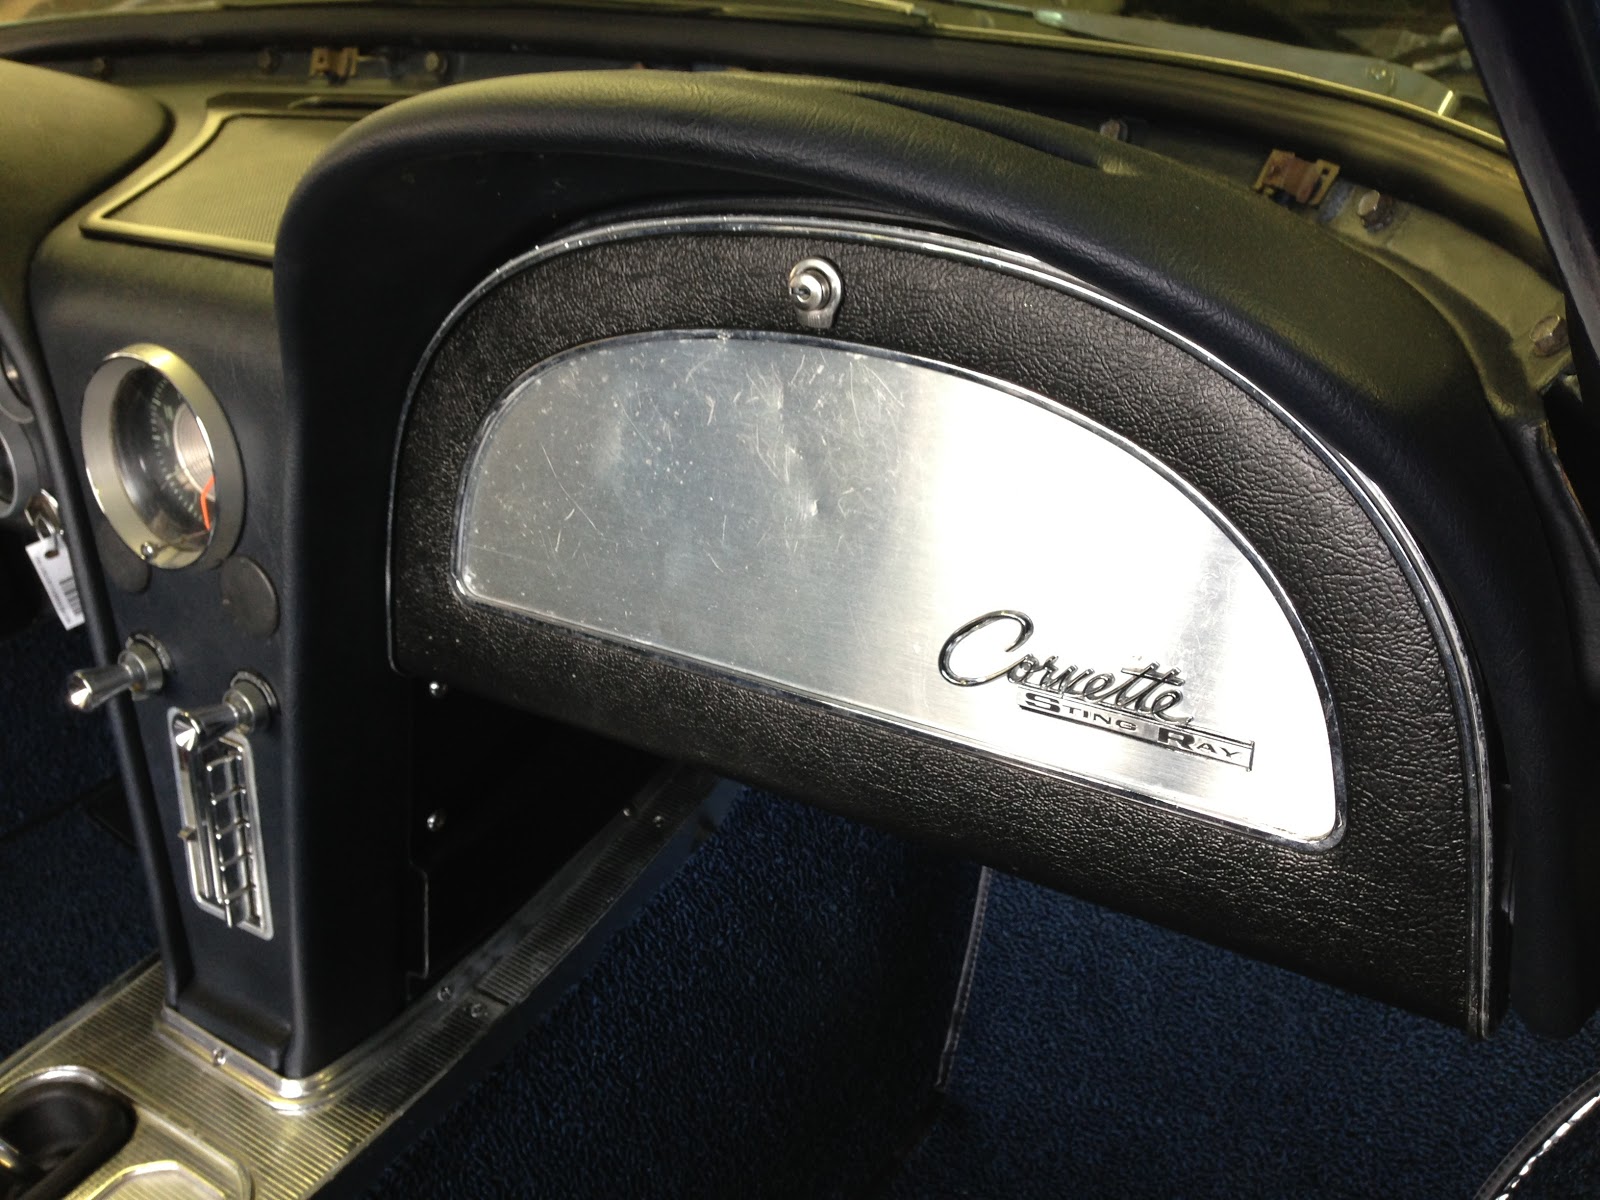
Gerri bought me a new Trim-Parts 1963 glove box door for my birthday.  How sweet is that?
It looks much better and I feel much better!
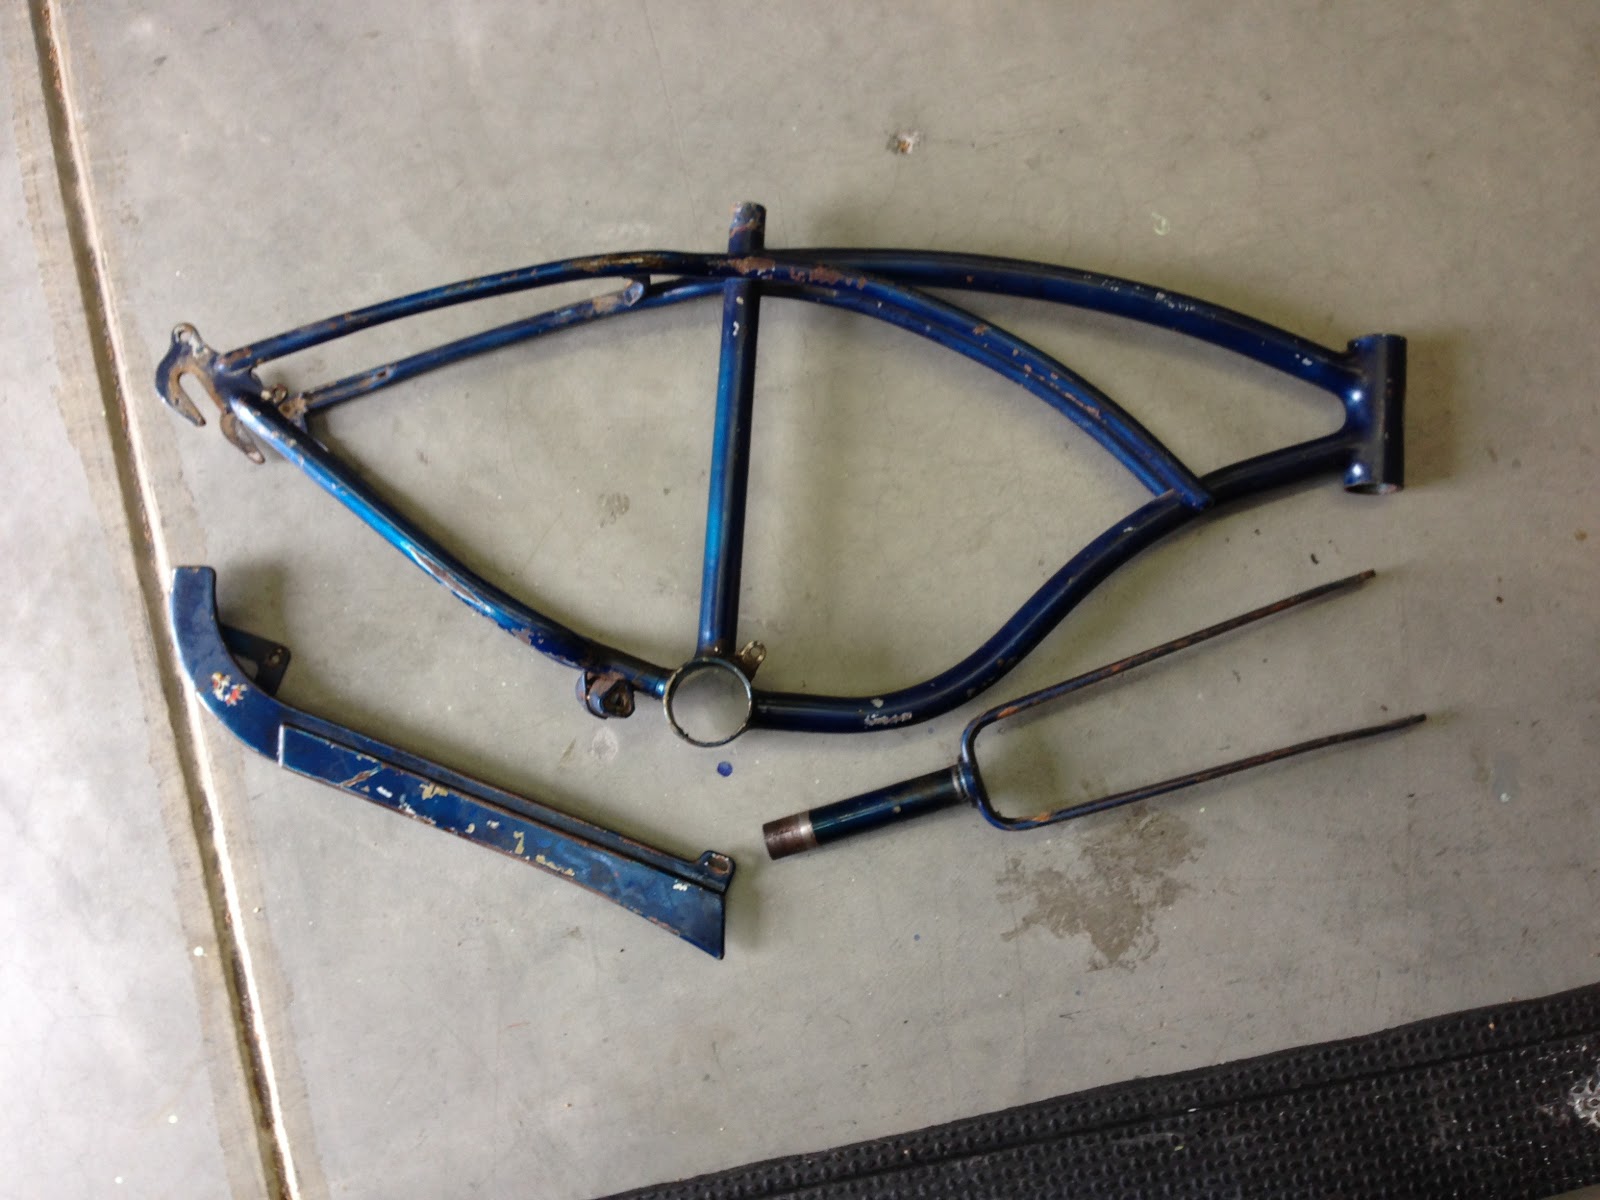
A NEW DISTRACTION
While in Wisconsin I picked this up.  Anybody know what type of bike this is?


It's my new distraction.  Come on guys, you know what this is.


CDN 2013 Update:  I believe I am still on track for Cool Desert Nights.  I need the seats upholstered and the side windows installed.  Al Knoch Interiors still owe me seat parts from over a month ago.  If anything is going to be iffy it will be the seats.  Wish me luck!  

Sunday, May 12, 2013

Ignition and Interior

A great website to learn about mechanical fuel injection is Ramjets that Run.  Ty and I got a lot of great information from this website including a picture that showed us that our high pressure fuel pump face plate was installed incorrectly.  This website also mentions that mechanical fuel injection engines require a robust ignition system.  Jerry Bramlett, the site owner, states:

It's important to use top quality parts in your ignition system. I recommend installing a new Delco plug wire set. I never use those "properly dated" reproduction plug wires because of their tendency to misfire under load. I prefer to use new ignition coils rather than 40 - 50 year old GM originals. You can buy new plug wires and coils from K&B Special Products near Atlanta. Their phone number is (770) 777-1031. The K&B Delco coils fit in original Corvette coil brackets and work properly with a stock low-resistance ballast resister. An excellent spark plug available today for injected Corvettes is the Autolite #295. This plug is a non-resister design equivalent to the discontinued AC 46.

The plugs installed in our Corvette were Champion resistor plugs (left).  I replaced all with the recommended copper core Autolite plug.


Our plug wires are properly dated for an early 1963.  Jerry says don't use them so I bought a new set of Delco wires from K&B Special Products as recommended.  The set came with straight caps but I wanted angle caps.  The straight caps are correct for an early 63 but later in that year they changed because of issues associated with ignition shield shorting.  I bought a set of angle caps.


  The new wires were installed on a new distributor cap.


Our coil is correct for a fuelie but  I don't know how old it is.  I got a new one (left).


Here's a picture of everything installed.  Yes, I need angle caps for the coil wire.


Plug wires 1 & 3 and 2 & 4 have to be routed behind the motor mounts if the radio shielding is going to be installed.  This is the shield and motor mount for wires 1 & 3. 


Here is a little better picture of the same shield.


The spark plugs also get a shield.  It's shown just below the exhaust manifold.  The distributor also gets a shield but that has to wait until I get the correct mounting hardware.  It's on order.


We have a new leather arm rest.  50 years took its toll on the old one. 


Vinyl pieces get glued to a few interior locations.  This piece goes between the split windows.


This is the fiberglass halo that came with the car.  The color is original and it's in good shape.


I cleaned it up with scuff pad then gave it a coat of clear.  It looks nice.


This is the headliner.  It's one big piece of plastic covered in vinyl.  It's concave and basically snaps into place without any hardware.  Interior trim pieces will ultimately secure it.  


Here is everything installed.  The vinyl between the split windows, the headliner, the halo and a new, functioning, courtesy light.  Not shown is the new arm rest.


I am working on the interior molding for the windshield.  In this picture it was just sand blasted.  I am working on fitment.  This will be painted and installed next weekend.  That's the next post.


All right guys and gals.  Be advised I am targeting Cool Desert Nights 2013 for the completion of our build.  Timing looks like it will be perfect and the event is more than fitting.  Wish me luck over the next several weeks.  CDN is the weekend of June 20th.

Thanks for watching!
  

Sunday, May 5, 2013

An Oil Leak, Center Council, and Seats

The oil leak was a combination of several things.  Loose valve covers, loose spark plugs, and an empty bolt hole (shown).  This is located on the front of the engine block in front of the fuel pump.


Viewed from below with an inspection mirror, you can see this is a open hole.  That's the fuel pump push rod on the far side of the hole.  Although this is not on the pressurized side of the oiling system, this open hole allowed oil to get on everything under the hood.


A bolt with sealant did the trick.  The bolt hole was used for front engine motor mounts used in the 50's.  It had no function in 63.


The center council was next.  That starts with the rubber shifter boot and retainer ring.  Also shown is the ash tray.


That's followed by radio side covers, center council trim and a trim ring.  Also shown is the arm rest.  This was installed for fitment only.  A new blue one is on order.


I finally got around to installing access plates located in front of the rear tires.    Also shown is the trailing arm center bolt and the stainless steel fuel line installed about 3 years ago.


The SEATS.

The fact that the seats are being worked tells me I am very close to being done with this restoration.  Think about it, the seats are the last "big ticket" item.  I am close!


The upholstery is generally correct but still not original to the car.  The seats were probably reupholstered 40+ years ago.  You can see they have lots of "patina".


Upholstery will be done by a highly recommended business located in Pasco.  They said it was OK for me to remove the existing upholstery and restore the frames.  Their only request was that I bring the old covers so they can see where the hog rings were located.


I ran about a 100 pounds of sand through the sand blaster.  The frames look great.  All the parts are there, there were no broken springs, and the sliding mechanisms function.


I blew sand out of the nooks and crannies then painted the frames with Por15.  The paint dried for a day then I irrigated the sliding mechanism with WD40.  I used a full can before they worked properly.  I will add white lithium grease after the seats have been upholstered. 
Double click on the photo.  The frames look really good.  


Blue leather seat covers, foam padding, clips, cardboard seat backing, hog rings and other seat related goodies have been ordered.  In fact, they shipped on March 30th so I expect them any day now.  When received, the folks in Pasco get to work their magic.

I found out some interesting things about the ignition system on our fuelie.  That will be the subject of our next post.

Thanks for watching.