Translate

Sunday, November 3, 2013

Post Completion Modifications

Since declaring the "Ugly Duckling" Corvette project complete I've been able to get a little run time behind the wheel.  As a result I've made a few modifications worth sharing.  Specifically:

OIL LEAK
I had an engine oil leak that took months to find.  It was at the front of the engine but only leaked at highway speeds.  Oil was everywhere.  Locating the leak was near impossible.  I changed out valve cover gaskets, replaced the fuel pump, replaced the oil pan gasket, doped up the NPT plug located just behind the water pump (see picture), tightened fittings, etc, etc, etc.  No luck.  Then I read about a pretty cool technique where you apply baby powder to the dry engine, take it for a spin, then look for the source of the leak.  Check out this picture.  Do you see it?  It's right behind the water pump at the top of the timing cover.


To get at the timing chain gasket I had to remove the radiator fan, water pump, starter, oil pan, harmonic balance and drop the tie-rods.  Shaw City Engines should be extremely embarrassed over the lack of workmanship here.  They totally missed 2 bolt holes on the gasket. Click on the photo for a better look.


The good news is it's all back together and there's not a drop of oil anywhere.


REAR DIFFERENTIAL
We had a date correct 4:11 rear differential installed but it was geared way too low for anything but stop light to stop light driving.  Out on the highway the engine was screaming at 70 MPH.  It just wasn't practical for driving to out of town car shows or events.  The 4:11 was removed and put on the shelf (shown).  I'll keep this rear end since it's correct for our fuelie but it will most likely spend the rest of it's life on the shelf.  


In it's place I installed a period correct fresh 3:36 differential.  This unit has very few miles on it, has the original finish, and it even has it's original red plastic tag warning to only use limited slip differential oil.  What a difference it made on the highway.  I'd be comfortable driving this car down the highway for extended periods with no concerns.  It's not as "neck snapping" as the 4:11 but still provides nice low end pull and is fun to drive.  This is a much better choice for weekend driving.


INSTRUMENT PANEL
There was a lot of work done on the dash instruments but in the end they were tired and showed their age (50 years old).  The speedometer was slow, the tachometer had a little wobble and the other gages were just... dull.  I pulled the instrument cluster out and freshened everything up.


The first thing I did was replace all of the dash bulbs with LED's. The original filament bulbs were yellow and very dim. An outfit called White Gauges has replacements and they are beautiful.  The dash is now bright and the light is white.  At $5 a bulb these are pricey but well worth the cost.


Here is a video I sent to Dennis K that I thought you might like to see.  Check out the White Gauges.


But the really cool thing about the gauges are the replacement gauges I found.  These gauges came out of a 1963 fuelie that was wrecked in 1965 with only 13,225 miles on them.  The owner pulled the gauge cluster out of the car then shelved it for 48 years.  Face down I might add.
There are several discussions on the NCR web page about the proper shade of the tachometer orange/red line.  These colors were very susceptible to fading and the general consensus is that nobody really knows what they looked like back in 63.  Well here it is folks, take a peak.  These colors are bright and original.  Best of all everything works flawlessly and operates as new.  This was a really great find and I am very pleased with the results.


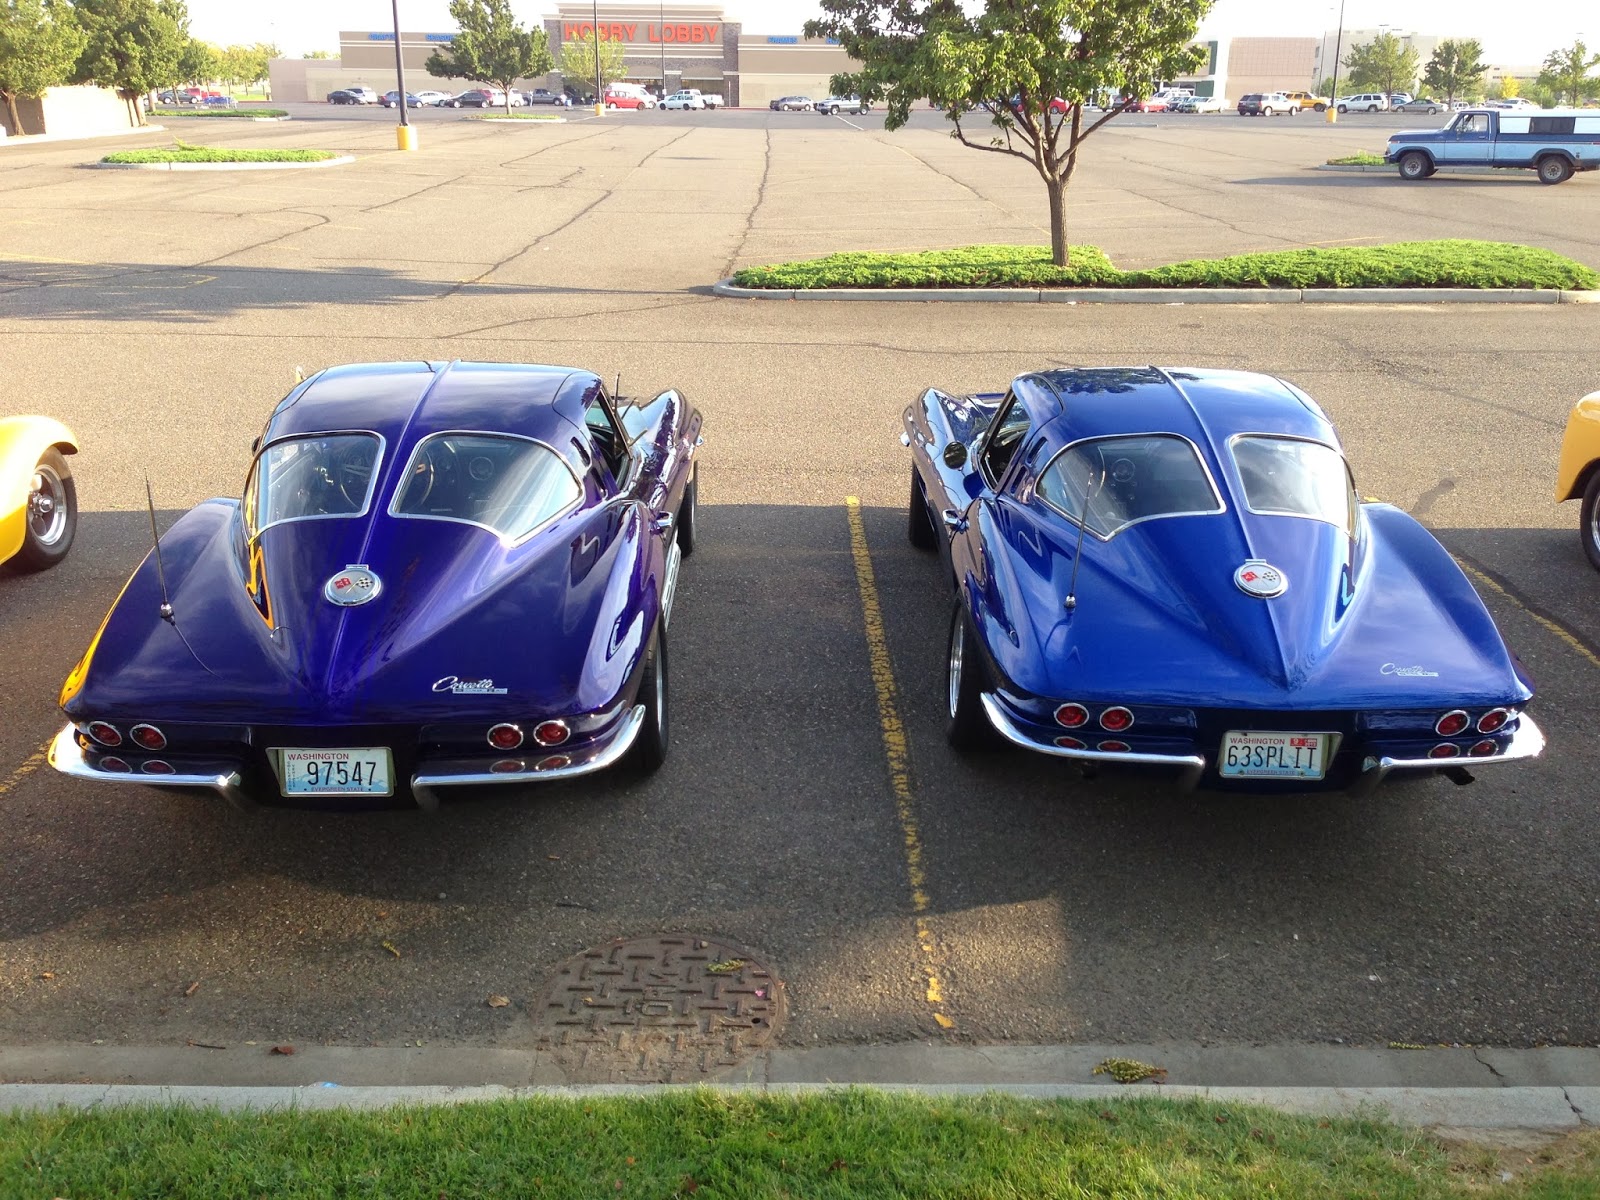
2 1963 SPLIT WINDOWS
What are the chances?  I went to a local Friday night gathering a few weeks ago and look what parked next to me.  Ours is on the left.  The other one was originally a fuelie but someone converted to a 350 years ago.  It, like ours, has period modifications and he drives it often.  It was fun seeing them side-by-side.  Turns out there are 2 more of these in town.  Hopefully I'll be able to get a picture of all 4 some day.

Well, that's it.  I know of a few more changes but don't expect weekly updates.  I'll post relevant information when changes are made.

Thanks for watching.

Saturday, August 17, 2013

Hot August Nights - Reno, NV - 2013

HOT AUGUST NIGHTS - 2013

Here we are Wednesday morning August 7, 2013 just minutes away from starting our 650 mile journey to Reno, NV.  We will  caravan with Dennis and Annette K and meet up with another friend, Jack M, on Friday.  Jack is flying to Reno.  


Here is Dennis and Annette's 33 Chevy.


The trip had long empty stretches of nothing.


One sign said, Last Gas for 100 Miles.  It was correct.


13 hours later we arrived in Reno.  We checked into the Silver Legacy hotel/casino and found ourselves on the 32nd floor overlooking downtown Reno.


Hot August Nights is not one big car show as I thought.  It's a dozen smaller shows all happening at the same time, most of them located at major casinos.  This is the early morning staging area for the Virginia Street Show and Shine located in downtown Reno.


They staged us in groups of 25 cars each.  We are in group 7 and our Corvette is the lead car.  Dennis is right behind me in his yellow 33 Chevy.


Here we are transitioning from the staging area to the Show and Shine. 


We were allowed to come and go from the event as often as we liked.  Gerri took a video of us a little later in the day.  Check it out here:


Unlike the other Show and Shines around town, Virginia Street provided shade throughout most of the morning.  When the sun hit our Corvette the comments really started coming.  


There were lots of interesting things to look at.


This is a Chevrolet Nomad with a Corvette front end.  Chevrolet almost put this into production but changed their mind at the last minute opting for the Bel Air front end.  This never made production.


There was an evening cruise every night.  We watched cars go by for 3 hours.  Jack is on the right.


Gerri spotted this husband and wife pair of C2 Corvettes.  The owner said it took 25 years to complete them.  Look close and you'll see the top and bottom colors are reversed between the cars.


We also took in a couple days of the Barrett Jackson auto auction.


The cars were incredible.


Anybody remember this set-up?


A Riddler winner from a previous year.


Cobra's anyone?


Although not this specific car, Barrett Jackson did sell a frame off, fuel injected, split window Corvette at this event for an astonishing $192,000. 


Yep.  I bought tickets.  Wish me luck.


How about a pair of 2014 Corvettes?


Here's the actual auction arena.  Wow!


We ended the weekend with cocktails.  Shown are Gerri, Annette, Jack and Dennis.
Hot August Nights was a blast and we will be sure to do it again.


OUR 1963 SPLIT WINDOW COUPE
Our Corvette drew a crowd all day long, every day.  Things people loved the most were the color, the split window and the fuel injection.  Only the hard core Corvette enthusiast appreciated the Heater Delete option.  My most memorable comment came from a young man that was seriously intent on making sure I knew that if they had a category for Best Paint I would have won it without question.  That was a great comment.  The most frequent comment was, "Wow!"  They were either talking about the color or the pre-restoration photos we displayed.


When I look at these pictures even I say wow. 


WRAPPING UP OUR RESTORATION
This has been a fun, fun build and I now have one of the most beautiful, most desirable, iconic cars ever built.  The car brings a smile to my face every time I look at it.  It is absolutely gorgeous and I mean it when I say the photos don't do it justice.  You have to see this car in person to appreciate the transformation this "Ugly Duckling" has made.

I have to thank Ty for his contribution.  Ty spent many many hours on this car and it wasn't just doing the easy stuff.  Ty wore plastic garbage bags as PPE when doing fiberglass work, spent hours of sanding with a long board helping to restore lost body lines, welded gaping holes in the frame, rebuilt a horribly deteriorated A pillar, and helped research and correct at least 5 fatal flaws found in the mechanical fuel injection unit.  I remember the first time Ty's wife Bonnie saw the car.  She told me she knew Ty would spend most every weekend working on this car for as long as he was able.  She was right.  Ty helped with this build for well over 2 years.  Ty brought a wealth of knowledge passed down from his father who specialized in the restoration of early Corvettes.  The camaraderie was great and we had a fun time.

I also have to thank Lester H, aka Wilson, who participated one summer doing fiberglass work.  Since then Lester has never missed a post.  Lester also made sure I built the car the way he wanted it, often gaming the system by logging onto different computers to vote when I polled my audience for feedback and recommendations.  Tire selection comes to mind.  Lester made sure all 4 tires were the same size.  He did not want small tires up front and large ones in the back.  He got his way and I am glad he did.

There are several other people I'd like to thank.  My brother Jim often helped with research while he was working in China, Jim Q made sure I got the correct stance, Aussie Pete helped from his garage in Australia, Max H watched from somewhere in Russia and always visited the garage whenever he was in town.  Cousin Chuck B was a church mouse, never commenting on the blog, but never missed a post.  Dennis S, Dennis K, Matt P and many others were also instrumental in how this restoration materialized.  It was great fun getting feedback and recommendations from everyone.  Thank you.

I have a list of things that still need to be done but they are all minor.  I'll spend the next few months working them off but mostly I'll be enjoying the Corvette at car shows and driving it around on early morning weekends.  I don't have any immediate plans to start my next project but when I do it will be my 1957 Chevy Nomad.  When that day comes I'll post a link should you have interest in following along.

Thanks to everyone that participated.  It is a great ride!


INTERESTING BLOG STATISTICS
  • 100,000 views and growing
  • Majority of the views are from USA
  • Other top countries include Sweden, Malaysia, Canada and Switzerland
  • 221 Posts
  • 582 Comments

INTERESTING BUILD STATISTICS
  • Shipping from Hawaii cost $4200
  • The air cleaner has a value of $7000
  • Per pound, the most expensive item is the rear window trim, valued at $3500 
  • Labor is over 3000 hours
  • Average NADA Classic Car retail value for a 1963 FI SWC is currently $132,000.


MORE PHOTOS FROM HOT AUGUST NIGHTS - 2013


That's all folks!

THE END

(As always, thanks for watching.)

Sunday, July 21, 2013

Completing the "Ugly Duckling" Project

I completely disassembled both doors to make sure the felt runners were installed properly, the window mechanisms operated smoothly, all the nuts and bolts were properly tightened, and to make sure the weather stripping and window moldings were weather tight.  I also installed a few pieces of Dynamat to muffle  door noises. 


I even installed the factory vapor barriers to protect the door panels. 


This is the door that received the salvaged hockey stick and other trim pieces.  Both doors turned out very nice and they are very solid.  Everything works as it should.


Just inside and behind each door jamb I installed vinyl covered cardboard inserts that cover the B pillars.  They clip to the fiberglass roof trim panel (halo) then...


they fasten to the door jamb with pinch welts.


The pinch welt caps on a 63 are unique because they have 2 screws.  All other C2 Corvettes have 1 screw.


The panels really give a nice finished look to the interior.


Al Knoch Interiors finally came through with the sun visors.  They look great.


Another unique item on a 63 Corvette is the Parking Brake assembly.  The major difference is where the mechanism goes through the firewall.  A 63 uses clips to fasten to the firewall, other years use a bracket with nuts and bolts.  These are very hard to find.   


Looking up and under the car, the emergency brake cable was attached to the e-brake mechanism. 


Here's the Parking Brake in its final location,


I had the seats recovered locally and all I can say is, "wow".


"Final Touch" upholstery did the work.  They thought the Al Knoch leather seat covers were exceptional.


I also had new seat chrome and mounting hardware installed.


The seats complete the interior and...


they complete the entire restoration.  Yes, after 4 years and 3 months, this is it.


I am closing the door on this restoration and calling it done.


So, this posting signals the completion of the "Ugly Duckling" restoration project.  There are still a few parts and pieces that need to be installed but nothing major.  I've had a ton of fun and I know many of you have enjoyed it from the beginning.  If you look at some of the early posts I am sure you'll agree this was an ambitious build.  Ah, the memories.

Our next car show is Hot August Nights in Reno, NV.  Dennis and Annette K. are bringing their Nomad and Gerri and will bring our Corvette.  This will be the first car show where the Corvette will be seen completed.  I will post pictures from Reno and include some interesting information about the build so be sure to watch for that.

So, one more post to go.

As always, thanks for watching.