Translate

Monday, September 10, 2012

Paint - UFC35 Clear

Up until now I've been using House of Kolor UC35 clear.  UC35 is extremely durable, dries fast, is very hard and it can be sanded the next day.  Now I am going to spray UFC35.  This stuff is bruise resistant, extremely flexible and it has an ultra-high gloss.  On one of my motorcycle paint jobs I had rubber cushions from the motorcycle seat leave indentations in the UFC35 clear.  I thought for sure I'd have to respray.  2 days later the indentations were gone.  It's neat stuff.  Self healing. 


Max H asked for a picture of me in my paint gear.  Both of the clears I use are very hazardous and I must use a good respirator, one made for solvent based paints.  I also wear a full face shield while spraying.


To further reduce the amount of debris in the paint I decided to turn off all the circulating fans and remove all the plastic from the floor.  Yes, I'll get over spray on everything but at least it's clear, not blue.  Besides, the garage needs a good cleaning.  This is the first coat of UFC35.  Contrary to what you see, the car is blue.


Four coats of UFC35 were applied.  It's very glossy and the debris in the clear is minimal.  It was a good call to turn off the circulating fans.


There is minimal orange peel but it's there.  Another full sanding will be required.  Note how the color looks like it goes from blue to black between the fender and the split window.  That's pretty much what it does.


You can see orange peel on the roof and top of the door.  It's not excessive but it will need to be fixed.


There is hardly any debris and very little orange peel here.  This area looks nice.


Once I cut and buff the clear we should be able to see my neighbors in the reflection.  That will be a good test.


The first step to a nice finish requires sanding.  I'll sand the clear until it's smooth and defect free.


It will take several weekends to complete the cut and buff stage.  It's tedious work.


More cutting and buffing to follow.  You won't be disappointed with the results (I've seen it!).

Monday, September 3, 2012

Sanding the Clearcoat / Interior Split Window Pictures

My brother Jim asked if I had wet sanded the clear coat yet.  I had not and I thought it would be a good topic for the blog.  Wet sanding, cutting, is very time consuming, tedious, and as Jim Q points out, it's easy to sand through an edge and ruin a good paint job.

I picked a spot the hood as a representative sample of what the rest of the car is like.  As you can see it's shiny but there are dust nibs and other imperfections.  The actual amount may surprise you. 


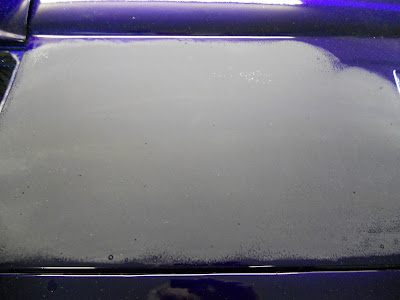
A quick 10 second pass with the orbital sander tells all.  Lots of dust and lots of orange peal.  I am using 1000 grit finishing film.  It's used dry, not wet.


After a couple minutes of additional sanding you can see the orange peal is starting to flatten out and go away.  The dust nibs are also starting to shrink but they're persistent.


Another 3 to 5 minutes of sanding and it's easy to see that the orange peal is mostly gone.  The dust nibs remain so I need to keep sanding.


This is much better.  It's mostly flat with few exceptions.  The question is, have I sanded through the clearcoat?  That's a good question and one that I check on frequently. 


Every few passes I take a clean cloth and wipe off the dust looking for signs of color.  As you can see the cloth is clean showing no signs of blue.  I am still in the clearcoat.
This part of the hood is now complete and I can move on to another section.  It's very labor intensive and it will take a long time to do the whole car.  Wish me luck.


A new follower to the blog, Steve L, asked for pictures of the inside of the split window.  He's trying to put the split back into his 63 and needs reference pictures.  Cutting out the split window was a common modification in 1963.  In fact, here's a 1963 article from Custom Corvettes magazine on how to make the change.  It was a neat customization until the 64 Corvettes came out with a 1 piece rear window.  This is why Steve wants the split window back.  The 1963 split window couple is a one year only design and it's very sought after.  Good luck Steve.


The brown color is old glue used to hold up a piece of vinyl between the two windows.


Yes, I finished sanding the car.  I was going to start buffing the paint but I had a couple blemishes that took a considerable amount of sanding.  The clearcoat would be thin in those areas.  I decided I would add a few more coats of clear so I'll be spraying the car again.  That will be the next post.

Thanks for watching.