Translate

Monday, November 15, 2010

Installing the Cooling System

I started with a 185 degree thermostat then...

Modified it by drilling two  3/8" holes as shown.  This will allow some water to pass the thermostat should it ever fail closed.

A water temperature gauge was installed...


Then the oil gage was reinstalled. (I know, it's not part of the cooling system)

The fan shroud was sandblasted then later painted with Por 15

A new aluminum radiator was installed.  The original would have been copper.

 It looks good.

The lower radiator hose is worth talking about.  It took me 30 minutes to install this thing.  Can't imagine what it would be like with the body on.  Look how it snakes around everything.

When it was all done we ended up with a motor that was ready to be run.  And that's just what we did. We ran it for about 10 to 15 minutes and found a few issues including:
  • A couple of the head bolts leaked because sealant wasn't properly used on the threads.  Each bolt will be removed, cleaned, sealant will be applied, then re-torqued before moving to the next bolt.
  • The paint on the exhaust manifolds cooked off within 30 seconds.  These will be repainted with high temperature aluminum exhaust manifold paint.
  • The timing and fuel mixture needs to be adjusted.  We will start that work after we redo the head bolts.
  • We found a threaded hole behind the idler pulley that leaked like a sieve.  It was lacking a plug.   A quick trip to Ace Hardware made this a quick fix.
The engine ran nice, sounded nice, and it's throaty.  My neighbor even came over and jokingly mentioned the noise.  I am not sure we'll ever be able to drive this thing without getting a ticket.  If we do get tickets we will frame each one.
More body work should be next.

Sunday, November 7, 2010

Fiberglass Work - Before and After Pictures

BEFORE & AFTER pictures of things we've been working on lately.

BEFORE - Both front and rear wheel wells on the right side of the car have cracked bonding.  Double click on the picture and you'll see the crack near the bottom.  This is the right front wheel well.


AFTER - Ty used the burr grinder to remove all the old bonding agent then, using a cake frosting bag, he piped in all new bonding agent.  It sounds simple but this was a dirty job that took several hours.


BEFORE - This is the right rear wheel well.  It has cracked bonding agent located behind the body mount.


AFTER -  Using the same technique, Ty removed the crack and installed new bonding agent.


BEFORE - This is a view of several unfinished fiberglass repairs we made to the transmission tunnel last year.  This is looking up from underneath the body and it's near the shifter.  Before we tilted the body on the body dolly, access to this area had been very limited.

AFTER - The hole at the top of the photo is for the ash tray.  The area just to the side of it will be cut out for the shifter.  We are waiting for the shifter boot plate so we can use it as a template.


BEFORE - This is a fiberglass repair we made last year that was temporarily painted over for Cool Desert Nights.  This repair area is located in the passenger foot well, on the firewall, viewed from the engine compartment.  The paint was removed this morning to finish the repair.


AFTER -  Fibre Strand Body Filler from Napa was used to fill irregularities in the fiberglass.  Although it looks far from finished, the area is flat and ready for paint.  This will be painted when we do the wheel wells.

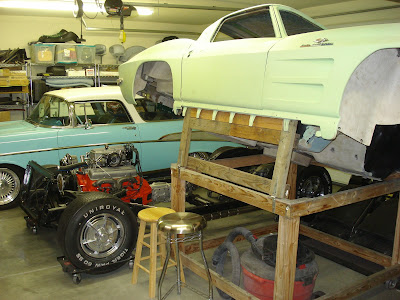
And finally, Max H. likes an occasional big picture of what's going on in the garage so here you go Max...  Enjoy!