Translate

Sunday, November 6, 2011

Body Work Continues

Issues on the body are generally fewer and less significant now, with this one exception.  The license plate area is very non-symmetrical.  Ty rolled up his sleeves and tackled this repair.


The circled area dips down about a quarter inch and the face is not symmetrical either.   


Ty reinforced the back with fiberglass, layed out a grid to understand the errors, then he ground away the dip and sanded the face until it was restored back to normal.  This area will look great once it's painted.


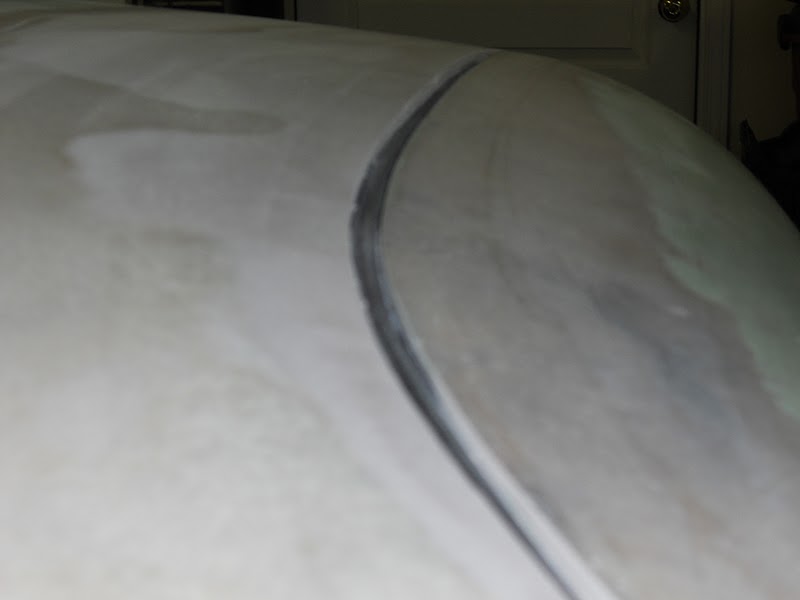
Ty also worked on the passenger side body lines.


The drivers side is equally as nice.


On 63 and 64 Corvettes the doors have a raised boss for the door handles but they don't match the handles very well.  We decided to outline the door handle then grind the bosses to match.


The bosses now match the handles perfectly.


We even worked on the hood and nose.  Yes, paint will make this look good too. 


Here you go Max.  A couple pictures of the whole body.


As promised, here's a little tidbit from the shop.

When we begin painting it will be critically important to keep moisture out of the air lines.  One of the ways to do that is to cool, condense and siphon off moisture before it goes into the air tank.  In this picture the manufacture had a 12" copper line that ran directly from the compressor to the tank.  As you can see we modified it.


This is the back side.  Using a design found on the internet, we made a radiator/condenser and it works great.  It even has an automatic valve at the bottom that purges moisture every time the compressor starts up.  Not only is the air drier but the unit runs quieter too.

We will switch to the shorter body dolly soon.  Keep watching!

Wednesday, October 26, 2011

Sanding Sanding Sanding

OK.  Here's the deal.  Finishing work is boring and there is little to photograph as far as progress goes.  So in order to satisfy those of you that demand periodic, meaningful updates, I will post progress photos and throw in some kind of tidbit information to keep your interest.  Lets give it a try.
  
Click on this photo and you will see a bump in the body line.  This was no doubt caused by all the fitting and sanding that was done when we restored the wheel wells.

Here is a little better look at it.  The bump is the original body line.  The area on both sides of the bump need to be built up.


After adding fiberglass followed by a little Bondo, the body line is looking much better.  Another couple hours were spent on this area after this picture was taken and the results are more than acceptable.


The same issue is on the passenger side but not quite so bad.


We are sanding the primer and the fiberglass until the surface is ready for the next coat of primer.  Since we are block sanding, the primer left on the fender is actually filling low spots.


The top of the right front fender is ready for primer.  It required very little sanding.

The right rear however required lots of sanding.  Yep, the same goes here.  The green that's left behind is filling low spots.  These low spots are only a few thousandths thick so it's not a big deal.


We keep finding that occasional area that needs to be repaired with fiberglass.  This one has since been dressed up and is ready for primer.


Corvettes are notorious for developing stress cracks.  The door handle area is especially prone because the handles are bolted down tight from the back side.  To help prevent new stress cracks we decided to actually mold the handles to the door panels.  The handles were wrapped in cellophane then held against the body with a wet layer of fiberglass sandwiched in between.  It worked great.


OK.  Here's that tidbit of information I talked about.  My brother Jim is moving to China and he didn't want to leave his Nomad in storage for several years.  He asked if I'd be interested and my wife told me I would.  I owned this car many years ago so it comes with a ton of sentimental value.  So we now have two Nomads and the garage is stuffed.  That's a good problem though.


Here's a picture of Gerri and I taken next to the Nomad about 25 years ago.  When the Corvette is finished this will be our next project.  Should be lots of fun.

As always, thanks for watching.

Wednesday, October 12, 2011

Body Removal - Round Two

Why was the body installed if we knew it had to be removed at a later date?

Good question.  If you'll remember, the car was purchased disassembled.  We didn't know how the body was shimmed, how the doors fit, what modifications were done over the last 48 years, and we didn't know how all the repairs we have made might affect the fit of other adjoining pieces.  So, instead of painting the body and finding out later there were issues, we decided to verify fit first.  We installed the body, fit the doors, headlights, hood, radiator support, bumpers, and the gas tank to mention a few.  We fixed body lines, filled extra screw holes and repaired our repairs (like the passenger A pillar to door interference). We got to drive the car and we made a list of things that need to be fixed or replaced on the rolling chassis (remember the white board?).  Installing the body and assembling the major components was a good idea but now it's time to dis-assemble and remove the body.  Lets get started.

These items weren't thrown on the table.  I set them there nicely and I intend to store them properly.


All the body bolts were removed and the body straps were hooked up.


That little $65 12 volt Harbor Freight winch worked just fine.


Radiator hoses, master brake cylinder, clutch rods and throttle lines had to be removed from under the hood.


The chassis was rolled out from under the body then the tall body dolly was put in its place.


The rolling chassis was put on the trailer then it was off to the car wash for a well needed cleaning.


We might not work on the chassis for a few weeks so it was covered up to protect it from the elements.


Now it's time to prepare the body for paint.  This will require making all the final fiberglass repairs, removing most of the existing primer, adding Bondo where needed, applying fresh primer, applying glazing compound, then guide coating and block sanding.  This will be long tedious work so be patient.

Expect the body to become less attractive over the next few weeks as we sand through the primer.  Don't worry though.  The *Ugly Duckling Project transformation should be soon.

Sunday, October 2, 2011

The Doors - 1963

In early 1963 Chevrolet discovered that the roof panel was not being produced to specification.  It was too small.  The die was about .10" too small which made for a poor fit at the upper door to roof panel.  Later in 63 the die was chrome plated which helped but never fully corrected the problem.  This error occurred on all coupes from 1963 to 1967.   So the question is, do we want our coupe to be as it was when it came off the production line or do we want it as the designers intended.  We opted for the latter.


Tape was used on the upper door so that the Bondo could be easily removed from this area. We don't want the door any taller than it already is.


After hours of sanding we ended up with very nice results.


Both doors received the same treatment and both turned out equally well.


The door to body gap was worked until uniform.


This should look really nice once painted.


Click on this photo and check it out.  After a little more primer and a little more sanding the doors should look like they were cut from the body, just like the designer intended back in 1963.

The body will be removed next.  Guaranteed.  Thanks for watching.

Tuesday, September 13, 2011

Finish Work Begins

We decided to start the finish work on the doors before removing the body.  The reason is because our body dolly no longer supports the nose of the car and we thought that might alter the doors alignment.  I started with the passenger door because there is a spot that I suspect needs more than just Bondo.


I was right.  Using a burr grinder I removed old damaged fiberglass all the way down to bright metal.  The fiberglass was feathered back so that the repair would cover a large area.  The larger the area the stronger the repair.


Five layers of fiberglass matte were used to make that repair.  While the fiberglass was curing I started sanding the louver area.   All blemishes and questionable areas were removed by grinding.  In this picture the areas that still have green primer are shallow/low areas that require Bondo. 


The green primer was removed before applying the Bondo.  Bondo is intended to be applied directly over fiberglass and metal, not primer.


After the fiberglass resin and the Bondo cured, the area was block sanded until smooth.  The next time we work in this area it will be for fresh primer.


Ty was able to come over for a couple hours today.  Ty used the same basic technique on the front of the passenger door.  After sanding, the thickest amount of filler material is estimated at only 1/32".


The passenger door is  2/3 done.  As we continue to finish the car we will have less and less primer.  You can gauge our progress by watching the primer disappear.


So how did we do on our first day of finish work?  Ty and I think we did pretty good.  Double click on the picture to judge for yourself.


After cleaning up the mess we took a few minutes to admire the car.  There is shop talk about a white racing stripe.  What do you think?

Friday, September 9, 2011

A Pillar Modification

When this A pillar was repaired over a year ago it was done without the benefit of the drip rail or the door being in place.  Now that the drip rail and door are hung/aligned we can see we don't have a gap between the door and the drip rail on the inside of the car.  An interior molding goes here so the gap must be increased.   


After examining all options we decided to modify the pillar in the area shown.  A gradual taper was needed starting at the mid point of the pillar working down to a 3/8" gap at the bottom.


The drip rail was removed then the pillar was cut using a thin cutting wheel.  The pillar was bent into its new position then prepared for welding.


Using dozens of tack welds the pillar was re-welded into place.


The tack welds were ground smooth then JB Weld was applied to fill in any nooks and crannies.


The drip rail was welded back in place then we check to see how everything fit.  We ended up with a nice even gap between the door and A pillar as viewed from outside the car.


And we have a respectable "3 tongue depressor" gap on the inside.  This will be perfect for that piece of molding.

Body removal should be next.  Stay tuned for that!