The first coat of primer sealer has been drying for a week now.
House of Kolor says
once the primer has dried more than 24 hours it should be scuffed with a maroon pad then another coat of primer should be applied and that's what we will do. In this picture the scuffing process is done in the foreground. Extra care is needed on all edges and corners otherwise we'll scuff through to green primer.
Scuffing takes several hours, many of it laying on your back getting those hard to reach places. While scuffing I am looking for any blemishes, runs, lint or debris. By fixing these flaws between each coat it reduces the chance of a substandard paint job. If we were using a filtered paint booth we wouldn't need to be this critical.
There's a spot on the nose that's been scuffed through to the green primer. This was caused by one drop of sweat when I was spraying the primer. I'll have to remember to wear a sweat band next time.
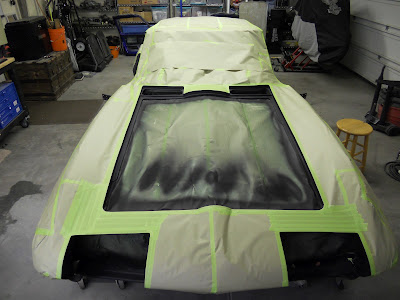
Because we're shooting Kandy, the entire car must be assembled before it gets painted. That means the door jambs, hood jamb, headlight recesses, and the rear valance areas must be painted before we can assemble. To do that we have to mask the car body.
I like to start the masking process with masking tape only. I apply the tape right at the edge of the body and the jamb.
I then install masking paper over the width of the previously applied tape.
Then we just keep adding masking paper as needed.
I don't want overspray anywhere on the body so I decided to mask/cover the whole car. This is overkill but I don't care.
I used plastic sheeting to complete the job.
Everything that's exposed is scuffed, degreased, and ready for paint. These areas will get a second coat of black primer sealer, two coats of Lapis Blue base coat, 3 coats of Cobalt Blue Kandy then two clear coats. All of this will happen in succession over a couple hours. We'll do that in a week or so after I receive a fresh order of catalyst.
Catalyst has a very short shelf life once opened. For this reason, I only purchase catalyst in small quantities and I only purchase it when I need it. Because of it's chemical nature catalyst can only be shipped by ground transportation so it will take a few days to get here.
I do have enough catalyst to make some paint repairs to the doors though. I'll explain why we have to make repairs in the next post.
As always, thanks for watching.


