Translate

Friday, March 22, 2013

Heater Delete & Wiper Motor

 The block-off plate for the heater motor is the last piece on our car that has rust issues.  There are also several drilled holes that are not original.  The one rusted hole in the upper right.


The Heater Delete block-off plate is rare.  I hesitate to make repairs as I am concerned that I may loose distinguishing marks that show authenticity.  The gasket number is a good example.


Welding was kept to short intermitent durations to prevent warping and to prevent the gasket from melting.  The rusted area in the corner was drilled out just large enough to get to sound metal.


Using a scribe, I marked a plug out of same gauge metal.


Using a copper backing bar, I made a series of alternating tack welds to minimize heat.


This is as much restoration as I am willing to do.  The block-off plate gets tucked up behind the passenger fender in the engine compartment against the fire wall.  It will be hard to see.  


A couple coats of flat black paint makes it look acceptable.


The original gasket survived and it will work as intended.


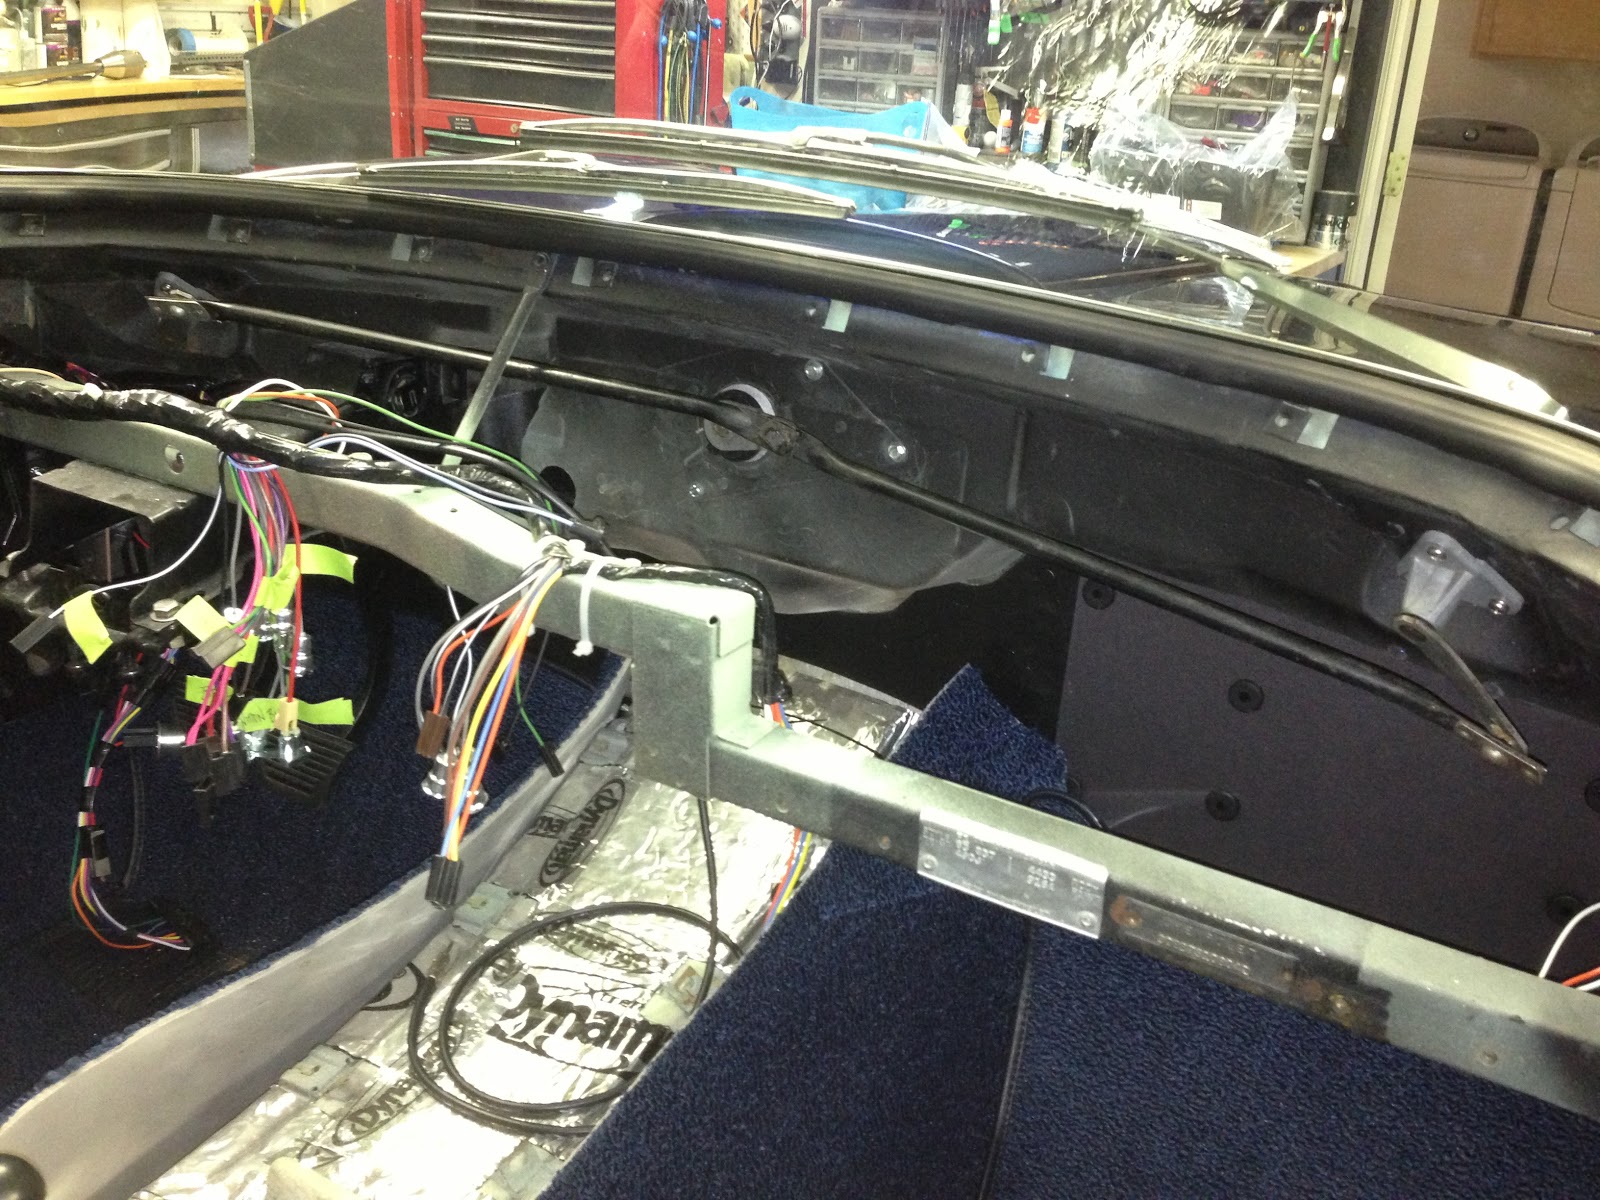
It's there.  Right in the middle of the picture.


The windshield wiper motor...what can I say.  After restoring the wrong one I searched E-bay for a replacement.  I bought this original, properly coded, fully restored motor.  All finishes are correct and the restoration included the washer pump assembly. 


Look close and you'll see 3 different plug-in locations.  The lone one is for the ground.


New rubber mounting hardware was included.


Clips, fasteners, plastic and rubber parts are all new.


As viewed from inside the car, installation was a easy with the dash removed.


It looks good and it tucked up nicely behind the distributor.


The wiper transmission is a simple design.  I put it in the blast box and freshened it up with crushed walnut.  Hoppies lubricant was used on all moving parts and it's now good as new.


This is the wiper transmission in the neutral configuration, or off position.  To insure proper wiper motion the left wiper lever must be positioned up and the right wiper lever positioned down.


The wipers work great and they look awesome.


More interior work is next.  Check back often for updates!

Sunday, March 10, 2013

On the Key

Electrical work continues.  The starter, alternator, courtesy light switches, voltage regulator and horn relay (shown) have been hooked up and/or installed.


I've been waiting for this adaptor for the last 3 weeks.  It connects a new Flaming River tilt wheel to our new wiring harness.  It comes complete with everything required including the Emergency Flasher.  Lectric Limited did a great job on this adapter, a far better solution than Flaming Rivers recommendation to cut and splice.


I am anxious to test the dash cluster but in order to connect the wires I had to fabricate these sliders.  The next photo shows the function. 


 The dash is temporarily installed with my fabricated rods attached. 


The rods are slid into the dash cluster screw holes.  This allows the cluster to be installed while allowing room to connect the wiring.  


I found the best way to get your hands behind the dash is to lay on your back with your feet stretching into the luggage compartment.  I could not have done it any other way.

So, what did I get accomplished?  Check out the video link below to find out:


Minutes ago I published another posting on coil springs and carpet.  Be sure to check it out. 

Coil Springs and Carpet

You'll recall I thought I had the front coil springs sorted out a few weeks ago.  All was good until I bounced the suspension and heard the coils and shocks rubbing together.  I dismantled everything.


 The performance option for the front suspension requires F40/F41 coil springs.  These have 7 coils, 12" free length, .668 wire and are part number 3832518.  I have 4 sets of coils so lets figure out which one is the correct one.  The second coil has 7 full coils but heavier wire.  This one is for a big block and immediately gets eliminated.  


The first spring is the one I just removed from the car.  I looked at the sales description and it says, made with modern day steel with the ride height of the F40/41 suspension.  Look close and you'll see all this manufacturer did was cut one full coil off of a standard spring.  Wrong.  The end of this spring is no longer flat topped and that's the reason why it buckled under compression and interfered with the shock.  That one is going in the garbage.   The middle coil was also sold as a F40/F41 like spring.  Look close and you'll see it doesn't have 7 full coils.  It's another aftermarket want-a-be.  The one on the right is an actual F40/F41 coil spring.  The pair are tagged, have never been used on a car, and they are as authentic as you can get.  These are the ones going on the car.  OEM rules, reproductions suck. 


C2 Corvettes with F40/F41 coils loose ride height over time.  The spring steel used back then is not as robust as today which causes the coils to soften over several years.  Fortunately, our coils are NOS and have never been used. 


I love the ride height and I hope you do too.  The real test is what Jim Q thinks.


We have carpet.  Look at all these pieces.  1963 was the only year to have these many pieces of carpet.  All the other years used molded carpet.  Molded carpet was cheaper but I like this better.


The carpet pieces have been laid in place with no adhesive.  I won't glue or trim any of the carpet until the car has seen several warm days.  I want it to acclimate and flatten first.


It looks really good front and rear.


Here's another great example of why I try to buy OEM vs reproduction.  This is the courtesy light door actuator.  The one on the top is original, the one on the bottom is a reproduction.  The length is obviously wrong but look close and you"ll see the threaded fitting is too large.  This threads into the bird cage frame and won't work unless I drill and tap.  No way.  I refurbished the original.


  Check out the new stance.  It's awesome.


Thanks for watching.

Sunday, March 3, 2013

Gauge Cluster Repair/Assembly

This is the speedometer.  The only difference between the speedometer and the tachometer is that the speedometer has the odometer and trip meter.  The odometer and trip meter are housed in the gray assembly shown in the lower right of this picture.  They are powered by the worm gear, center left.


 Everything was disassembled and cleaned.  Hoppies lubricant was used during reassembly.


The pointer is pushed onto a pin while turning counter clockwise.  When it hits 0 you stop turning.  It is  press fit only.  No threads, no glue.  I chose not to zero out the odometer.


The small gauges are mounted to stamped brackets, two gauges on each.  This one holds the temperature gauge on the top and the oil pressure gauge on the bottom.  Unfortunately, this bracket had been modified and the temperature gauge won't fit.  I need to fix the large hole on the top.


I traced out the outline of the hole onto sheet metal then trimmed it to fit.


Here it is clamped into position.


I positioned a copper bar on the back side then welded the plug using a series of tack welds.  The copper bar dissipates heat so fast that it doesn't melt.  It holds the molten puddle until it solidifies.


The tack welds were ground smooth.


 Then I cut the correct hole using a Dremmel.


Here is the bracket with both gauges installed.


This is the mechanism for the oil pressure gauge.  It's mechanical only, not electric.


The gauges have been cleaned, lubricated and mounted to their bracket.


The brackets and gauges are mounted to the backside of the dash cluster.


Here's the dash cluster before we started the rebuild.  I media blasted and painted the housing, buffed and polished all the original plastic lenses, repaired the tachometer, replaced all the small gauges with 1963 gauges, welded a mounting bracket for the temperature gauge, cleaned and lubricated all the mechanical components, purchased new switches then I reassembled everything.  So, how did it turn out?


I think it turned out pretty darn good. Click on the photo for a closeup.


Earlier today I posted information about the tachometer.  If you didn't see it be sure to check it out.

Thanks for watching. 

Tachometer Repair

When purchased, our tachometer didn't have a pointer/needle.  I found it later in a box with other gauges and parts.  The pointer was in horrible condition.  I purchased a new pointer but when I tried to install it there wasn't anything to attach it too.  The pin that the pointer attaches to was missing.  I found it in the old pointer.  That's it in the picture. 


This is the piece with the broken shaft.  After searching the Internet I couldn't find anyone that sells replacement parts.  It's too small to weld and glue won't work.  I decided to repair the piece by fabricating a new pin.  


Using my mini-lathe I made a new pin out of brass.


This shows the damaged shaft with broken end piece.  My fabricated brass piece is also shown.  


I decided later that the brass probably wouldn't hold up.  I made a new one out of a grade 5 bolt.  The exacto is pointing to the steel one.


I trimmed back the shaft then cut a brass tube to couple the two pieces.


5 minute epoxy was used to hold everything together.


It's hard to see but we now have a pin to attach the pointer.


It works great.


A couple days ago I posted about the windshield wiper motor.  If you missed it check it out.

Friday, March 1, 2013

Windshield Wiper Motor (Revised)

FYI - This is our 200th posting.
While I wait for dash parts I thought I'd check out the windshield wiper motor.  I bought this motor months ago on eBay.  The motor was sold as a core in unknown condition.  I got it cheap and I intended to have it rebuilt.  A rebuilt 1963 wiper motor without core can go for $500 to $600.


It looks dirty but other than that...


I opened it up out of curiosity and found good looking internal.  The grease was old but everything looked pretty good.  So I grabbed a 12 volt battery and tried to make it run.  Success!  Both speeds! 


Using carburetor cleaner I was able to remove all of the old grease.  Surprisingly, the gears and other mechanism look like new.


The windshield washer pump end cap has a hole in it so it's toasted.   But this part is easy to replace.  I removed the working parts and cleaned them as well.  Everything was re-assembled with waterproof silicone grease.  


I cleaned the outer case and stamped steel parts using crushed walnut shells in my blast box.  I masked the parts then applied a fresh coat of paint.


All I need is a missing rubber boot behind the wiper arm and...


I need the end cap for the washer pump.  Other than that, this thing is done.


With the money saved I think I'll shop for a clock for the dash.  The one I have died a horrible death in Hawaii.  The salt air destroyed it.  Yeah, maybe a clock...


POST SCRIPT

Turns out this wiper motor does not fit a 1963 Corvette. A 63 has 4 mounting positions, not 3 as shown.  So, watch for a future posting as I try to get this sorted out.  Dennis K and I will have a booth at the Portland Swap Meet this year.  You can bet this motor will be on the table.  

POST POST SCRIPT
By popular demand, the clock that died a horrible death.  This is all that's left: